Showing posts with label SMD5050. Show all posts

Friday, 3 June 2016

Big Bar Sign


Big Bar Sign

I was asked to make a light up bar sign for the Rabbit Hole Stage at Glastonbury Festival.  

It had to be big, colourful, pretty, safe, strong, waterproof and look good during the day and night.  

It was agreed that I would do everything apart from the arty bit in the middle.  This bit would be painted on site by a friend.

Here it is, ready to be taken on site.........


My design notes..... 


The original sign......


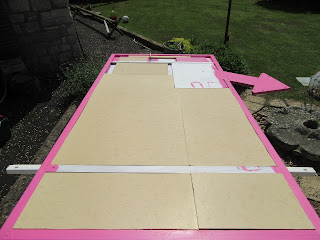
Marking out and measuring up......


Undercoating......


 Measuring out the LEDs........


Rabbit Hole Blue.........


And pink.........


BAR letters laser cut out of 6mm MDF.......


MDF light box being sealed.......


And positioned........


More blue.......


Outside LEDs  soldered together........


BAR LEDs fitted.....  
Controllers positioned.....  
Transformer installed.....


Testing LEDs.....


More pink paint..... 


Rear strengthening....... 


Sealing the letters.....


Homemade steel hanging brackets.....


Bracing and back paneling.....


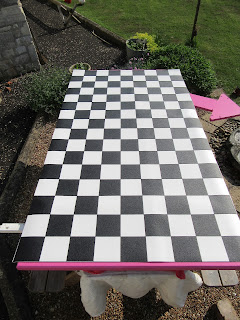
 Rabbit Hole vinyl flooring.....


Finished and ready.....


Thanks to EL Wirecraft for BAR LEDs.....


www.elwirecraft.co.uk

Artisan Models for laser cutting.....

www.artisanmodelmakers.co.uk

And everyone else who knows me......

I will update this page when the arty bit is added.....


Frog xx


Tuesday, 12 January 2016


A short flashy video on how to operate This Shirt


Now Sold......


Frog.  xx


Thursday, 5 November 2015

LED Bar Sign

I was asked to make a light up bar sign.

So I did.

Here is a video of the LED items that I got.......


I'd not used these before and so had a little play with them.

I got two mini controllers, some RGB SMD5050 strips and some RGB SMD5050 pads.

Then using an old cabinet door, I planned the LED quantities I needed:


Dry fitting with masking tape:


Drilling holes to tuck the linking wires into:


Dark test:


Spot of paint.  For this I stuck little round stickers on each LED, sprayed the whole thing and then pulled the stickers off the LEDs:


Finished:.


Things you may be interest in:

1) I used 2 controllers.  One for the border and one for the BAR letters.
2) I reversed two of the coloured wires for the A.  This made the green and blue opposite which make me look quite clever.  In the photo above, all 3 are red as no green and blue are used.


Here is a video of the completed sign working:

The sign ran on a propriety 12v transformer, directly from a 240v supply.  The back was covered to hide all the wires and it was hung above the bar at Glastonbury for all to see.  I installed it Wednesday lunchtime and removed it Monday afternoon meaning that the LEDs ran non-stop for 6 days.

Working with these LEDs was easy and now I know how good these mini controllers are, I will definitely be getting some more.

I want a costume of LEDs but am concerned that too many will be too bright to look at and so I'm currently designing a costume that will have a mixture of EL wire and LEDs.

Cheers for now,

Frog xx.