Decisions, decisions.......
I decided to make a suit that combined LED lighting and EL wire.
I couldn't decide if this would be for me (again) or for sale.
And so as I embarked on this project, I decided to create something to my highest level of quality - to keep my options open.
If you want to see the completed video, scroll to the bottom of this post.
Ultra EL Wire
I had read about a new type of EL Wire that contained a stronger core wire.
This meant that breakages when wearing the costume at a busy event were less likely.
This item is called Ultra EL Wire and details of it can be seen here
As soon as it arrived, I knew it was ideal for wearable use as it would be less likely to break whilst out and about.
Its stunningly bright too.
I ordered 3 meters of Tron blue, 3 meters of red and 3 meters of gold.
The LEDs
The LEDs are SMD 5050 RGB and came as linked pads with each pad containing an array of 4 LEDS. I also had some pads of 3 left from the LED bar sign.
I chose to use a total of 38 LEDs which I hoped would not drain the battery too quickly. I know that flashing the LEDs is kinder to the battery and that static bright is worse.
Good job I like them flashing then!
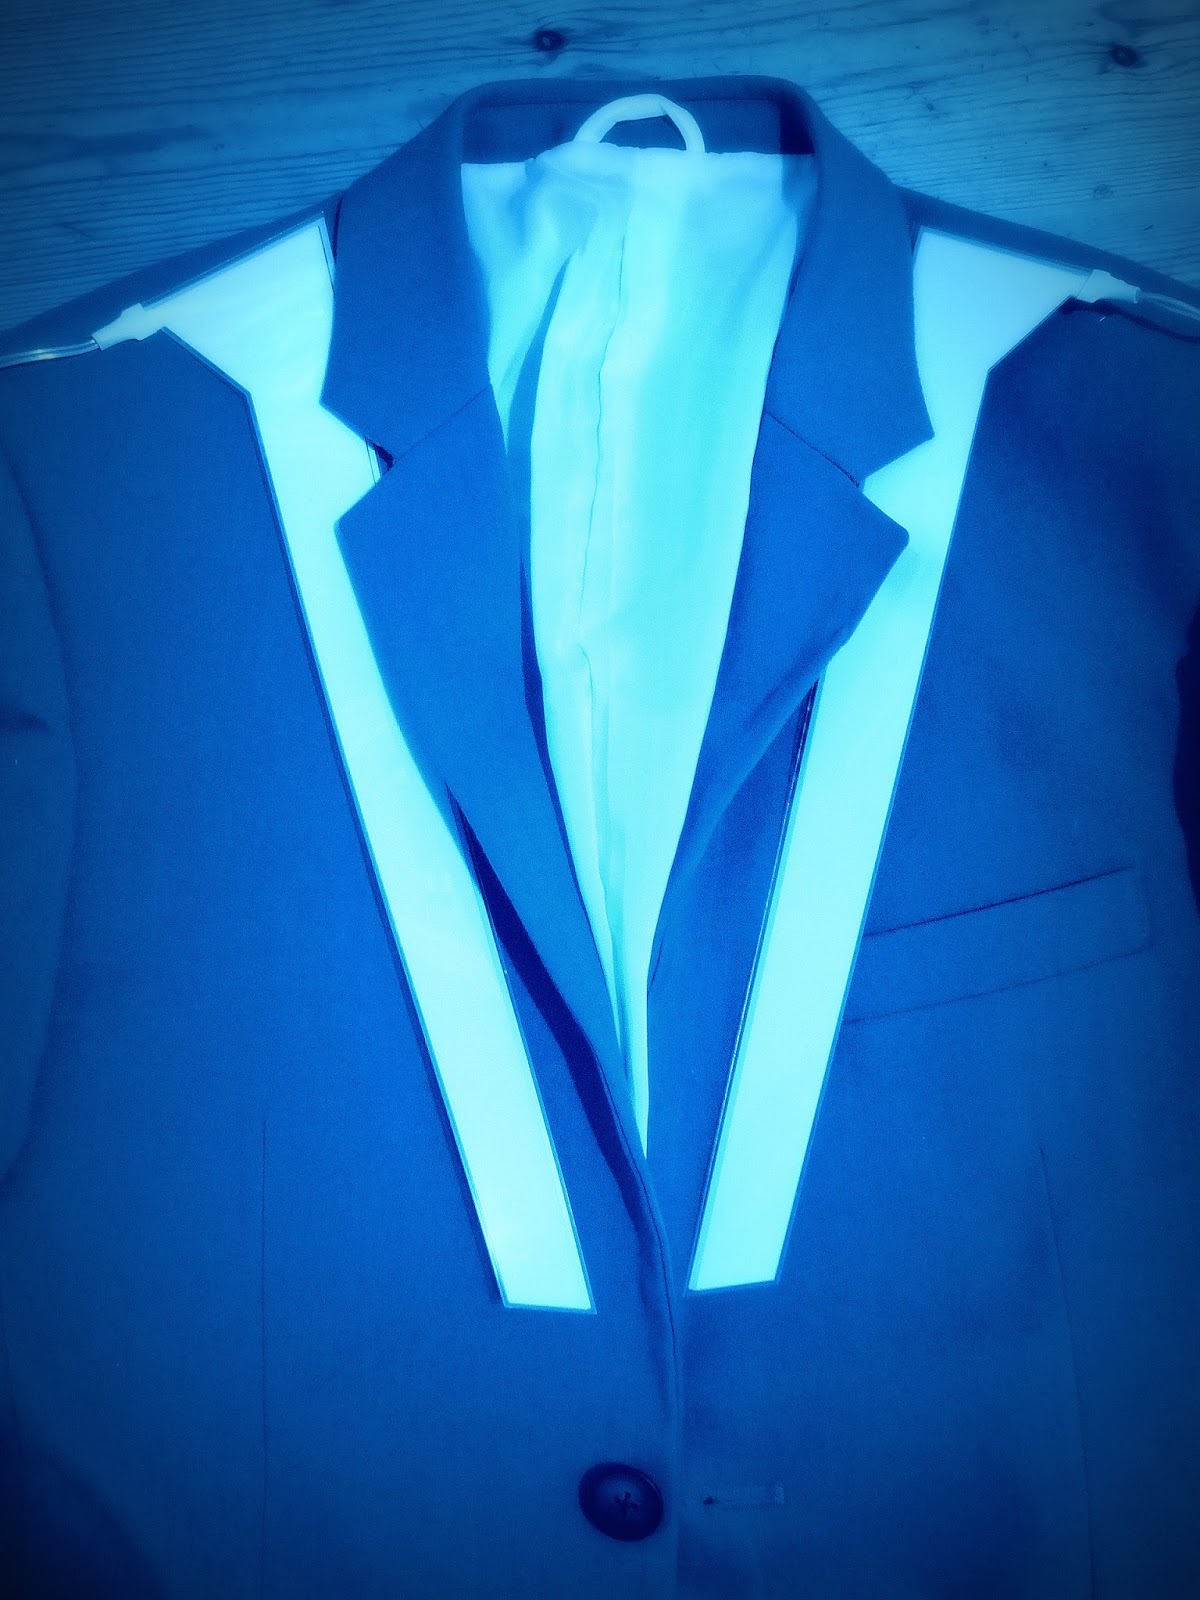
Base Layer
I bought a black linen shirt for the base layer. Once loaded with electronics it would not be washed and so I will only wear this out with a T-shirt underneath.
Here is the wire, LEDs and shirt being tested:

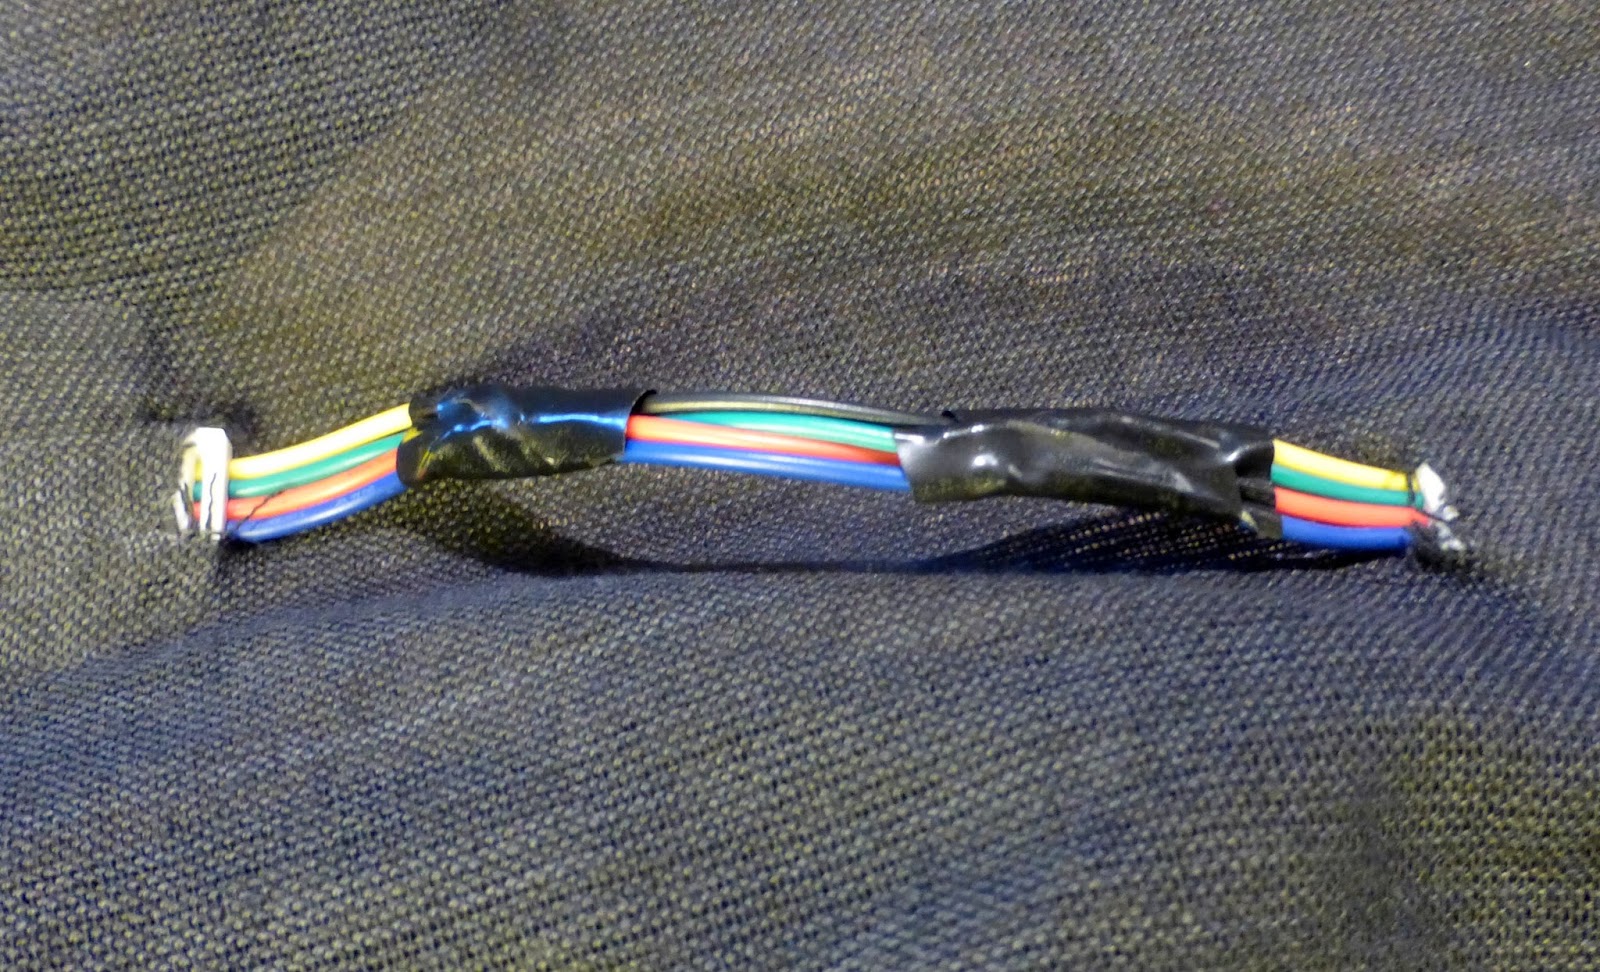
I decided to separate the LED pads to space them round the shirt more which meant that the wires had to be extended. There are 4 wires that link each pad. Red, blue and green for the colours and yellow (or black) for the common +12v return.
Here are the LED positions I chose along with how to wire them all together:

There are around 120 solder joints for the LEDs alone. Each joint is covered in heat shrink to prevent shorts and then the 4 wires are wrapped with insulation tape to help prevent them pulling apart when moving.


The wires are on the inside of the shirt. Later I used black cotton thread to sew them down.
Controller
To control the lights I designed and made a new controller.
Here is the project box with the cut-outs:

And with the switches fitted:

The white LED switch block allows me to select from 20 pre-set colours or 20 pre-set fades / flashes. I can also change the brightness and speed of these.
In short, these controllers are AMAZING!

With the wires fitted inside, there is only just enough room:

The toggle switch provides power to the LEDs and the red button is for momentary power to the LEDs. However, when power is supplied, it takes about half a second for the LEDs to light. So flashing them manually in time with the music is not really possible.
The 3 black momentary buttons are for the EL Wire channels. These are instant and make it easy to flash in time with the music.

Wiring Diagrams
For the whole shirt:

For the controller:
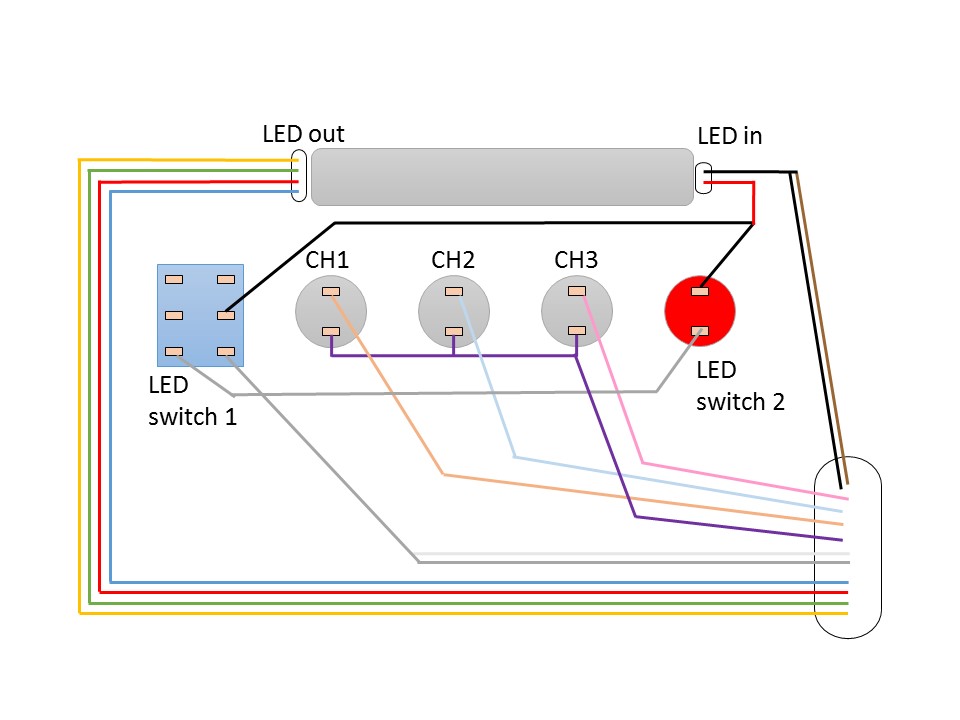

And here are the pin-out colours:
 Connection System
I used a 12 core cable

And a 15 way HD D type connector:

The distribution box was used to connect everything up:

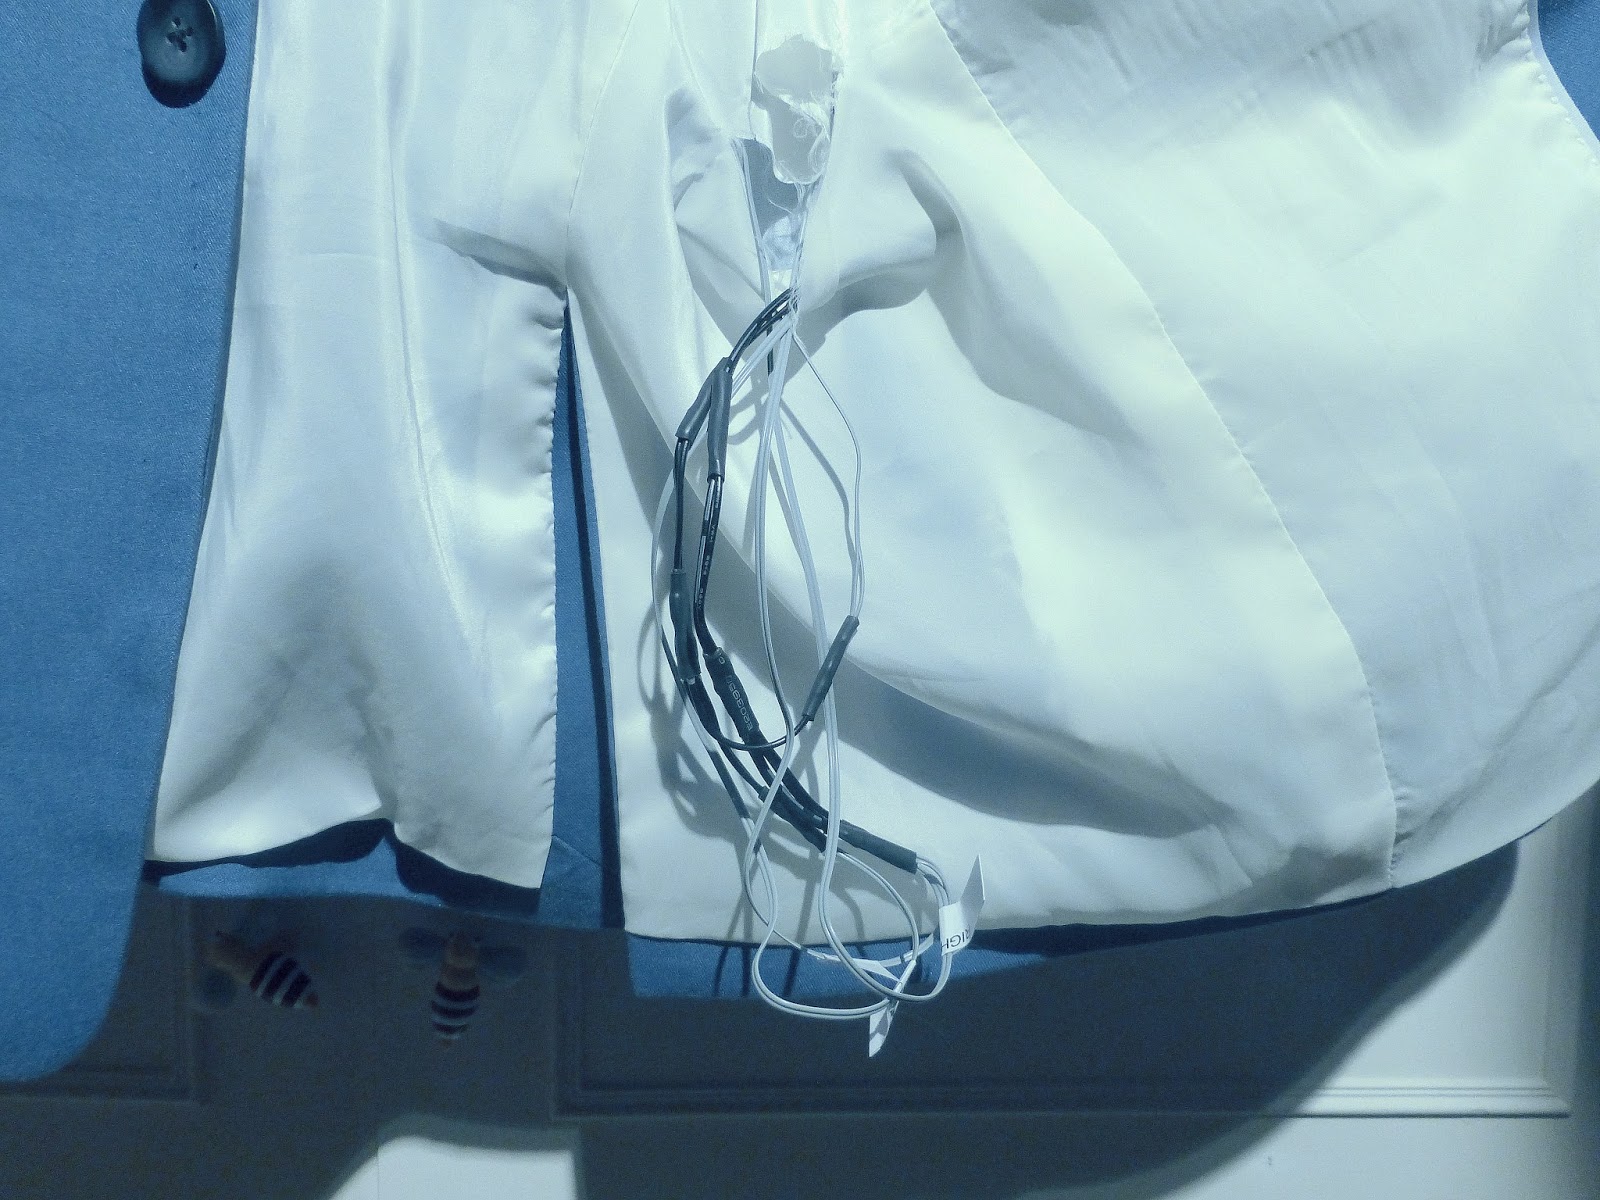
EL Wire
Having finally completed the LEDs and the control system, it was time to start attaching the EL Wire.
I rough positioned each wire in turn with tape and then took to sewing it all on.


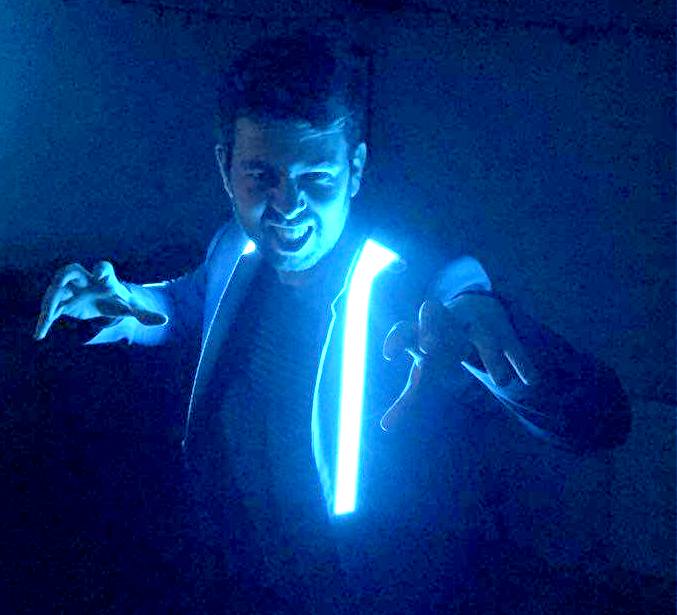
Completion Photos


How the system works
The battery power is split into 2 separate supplies.
One supply is for the LEDs and one for the EL Wire driver.
From there the two systems are independent.

I will be wearing this shirt on NYE 2015 and following that, will probably put the shirt up for sale in 2016.
Now for the video.........
Happy New Year!
UPDATE....... Happy to announce this has SOLD.

Frog xx


