Friday 3 June 2016

Big Bar Sign


Big Bar Sign

I was asked to make a light up bar sign for the Rabbit Hole Stage at Glastonbury Festival.  

It had to be big, colourful, pretty, safe, strong, waterproof and look good during the day and night.  

It was agreed that I would do everything apart from the arty bit in the middle.  This bit would be painted on site by a friend.

Here it is, ready to be taken on site.........


My design notes..... 


The original sign......


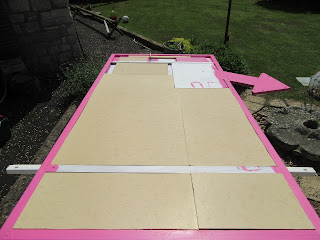
Marking out and measuring up......


Undercoating......


 Measuring out the LEDs........


Rabbit Hole Blue.........


And pink.........


BAR letters laser cut out of 6mm MDF.......


MDF light box being sealed.......


And positioned........


More blue.......


Outside LEDs  soldered together........


BAR LEDs fitted.....  
Controllers positioned.....  
Transformer installed.....


Testing LEDs.....


More pink paint..... 


Rear strengthening....... 


Sealing the letters.....


Homemade steel hanging brackets.....


Bracing and back paneling.....


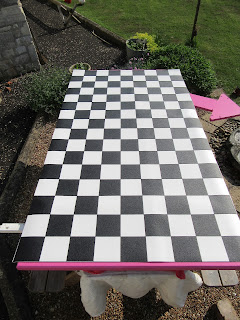
 Rabbit Hole vinyl flooring.....


Finished and ready.....


Thanks to EL Wirecraft for BAR LEDs.....


www.elwirecraft.co.uk

Artisan Models for laser cutting.....

www.artisanmodelmakers.co.uk

And everyone else who knows me......

I will update this page when the arty bit is added.....


Frog xx


Sunday 24 April 2016

Gold LED Shirt


A golden shirt that shines by day and dazzles by night..........


132 Chasing LEDs, Magic Colour


Video:   


And some pictures:


Thanks for looking,

Frog xx

Sunday 3 April 2016

White Chasing LED Suit


How I made the White Chasing LED Suit


The LEDs are supplied on a 5 meter strip and are widely known as "Magic Dream Colour"

The are RGB and the strip contains a 6803 IC processor.

The 5m strip came with a controller and I purchased a second strip of 5m.


The system came with wires that broke as soon as I moved them.  So I replaced them with better, stronger ones.  Also, the connectors were cheep and untrustworthy, so they were binned too.

The LEDs are grouped into a "unit" of 3 and the strips can be cut between each "unit". Roughly every 10cm.  I soldered all my wires as I trust this more than cheep connectors.  

To run each strip of LEDs, there are 4 wires.  +12V, -Ground, Data line & Clock line.  

After lots of planning, I decided on where to cut, where to position, and how to connect each strip.

Here are some photos of the strips and my soldering .....


The strips were fastened to the boiler suit using cable ties.  

Then I glued white ribbon over each strip to hide them.

The LEDs shine through the ribbon.


Under the suit I wear trousers or shorts with pockets.  

My existing battery goes in the back pocket, connector in the front.

I fitted the suit with a green connector to enable the controller to be removed.  This is essential for getting in and out as the suit doesn't actually have any pockets (I chose this as I wanted to avoid it looking like a pair of overalls).


There is a hand controller that works on radio that mimics the controller buttons. 


Button functions are on/off, pause a pattern, speed, pattern and set the length of the pattern.

There are 133 patterns to choose from but you can only scroll up or down them in sequence.  To enable me to go from say pattern 22 to pattern 74 without the 52 patterns being seen I have fitted a "kill switch" on the +12V line between the controller and the LED strips.  This is the black and red latching button.

Enjoy the video, questions welcome, see you in a field soon!


Frog xx

Saturday 13 February 2016

EL Wire Cocktail Sign


This recent project was another bar sign.

This computer image was generated and agreed upon:


The order placed and the parts arrived:


Its about 90cm x 80cm

To transfer the image from the laptop to the sign, I used a digital projector and white marker pen:


Then I had to find a good glue that could glue PVC tube to acrylic.  The 4th type of glue I tried worked best.


The Ultra EL wire was threaded through clear PVC tubes that were cut to length for each letter.


The glue took 24 hours to fully set and I used tape to hold the letters in place.


I did the gluing over about 6 or 7 evenings.

The tight curves in the R's kept coming off and so they took 3 goes to get them to finally stick.

When it was finished, the sign looked great........


Cheers,

Frog xx